Food photography tips
With the introduction of Pinterest and other similarly styled sites, you don’t stand a chance without a respectable photo to refer traffic.
You don’t have to have a million dollar lighting set-up, a super expensive camera, or a degree in photography to improve your shots. Here are a few tips I’ve learned along the way by studying photography that inspires me and taking loads of bad photos. I’m still learning as I go.
Lighting
Natural light, hands down, is the best light to use with food. What happens if you work full time or have a great dinner to share and have to capture your meal after the sun goes down? The “no fail” solution = is the Lowel Ego tabletop light. This lighting kit is a piece of cake to set up (about one minute), lightweight, easy to move around, and is affordable at $143. It includes bulbs, the lamp, and a bounce reflector board that is far sturdier than the piece of foam board that I used to use. You can literally take food photos at night that appear to be taken near a window in full daylight.


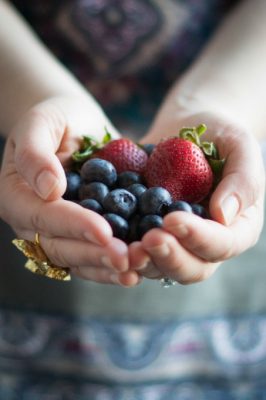
Pre-prep
Some food is beautiful before you cook it, particularly produce. Be sure to capture your ingredients in their purest form, if appropriate. Just make sure your food on display doesn’t have any brown spots or other imperfections that will degrade your photo.
Prep
A culinary creation does not go from an idea to a pretty plate so document how it really happens. There are many steps between that can add to the visual interest! Food prep shots can be important to show your reader how to execute a complicated step, which can be far more effective than explaining it in words. The in-between steps also help you craft a story, rather than just posting a recipe.
A few photos of prep are simply fun, a nice aesthetic addition, and can help the recipe feel doable.
Garnish!
What if your food is all white? Or all brown? Or just looks a wee bit muddy or lackluster? Be creative and garnish to add some color and break up large areas of solid color. Examples of adding garnish could be adding a lemon to the top of a lemon cake, snipped basil on a bowl of alfredo, or ripe berries on the plate of a piece of chocolate cake.
Angle
Most of us have a bad habit of wanting to always shoot something at the angle we see it. Change your view and change up your composition! A unique angle can make a dull photo more captivating.

Depth of Field
Aperture is a critical tool to master no matter what you are shooting. In fact, I usually put my camera in Aperture mode when photographing food. If you want to focus on one specific thing while softening the rest of the objects in the frame, you’ll want to use a low F-stop. If you want everything in the frame to be sharp, use a high F-stop.
Boosting Color
There is no shame in bumping up the color to add a subtle pop using your of choice. You can simply increase the saturation, but that doesn’t always work well because it increases the saturation of everything. I fzing. nd adding a bit more yellow makes all food look more appetizing. Keep in mind, you don’t want the final result to look unrealistic, but you want to make it appear as it does when you view it with your eyes.
A Few Last Tips
- Grab a shot of food on the table if you can, even if it is partially consumed (as long as it still looks good). Food is real and people digging right in is a good thing!
- A pretty place mat, dish, or surface can make a good photo great.
- Don’t get hung up on perfection. Food isn’t perfect, lighting isn’t always perfect, and sometimes the only equipment you may have is a cell phone camera. Just go for it.