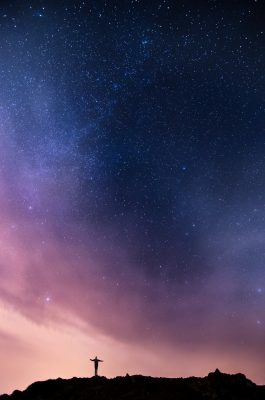
Night sky photography
Since we are on a nature roll let’s hit some more elements. Try night sky photography. The “sky” is the limit on the variations. Here are some hints.
1. LOCATION SCOUTING
This is actually the first thing I do when I plan a trip to photograph the stars. There are various tools you can use for this. I mainly use Google Maps to search for a location that would work good in low light situation. This means that it should be somewhere that has low light pollution. I try to find a place that is at least couple kilometers from a small town or 20 kilometers from a city. I sometimes also go out drive around without a specific place in mind to search for an interesting place.
2. WEATHER FORECAST
3. TIMING
Plan the trip for the darkest moments of the night. This is how you will get most out of the stars. The darker it is the more the stars will show in your capture when you have the correct camera settings. Planning a trip when the moon wont be the brightest also is very important if you want to capture stars. Moon can easily get in the way of milky way.
4. EQUIPMENT & SETTINGS
So this is not a list that you should go and buy, just my tools of use.
Tripod, or something to keep your camera steady for long exposures. I have used quite a few tripods and I really like what I currently have a Sirui Ball Head K-40X.
Use wide angle lens if you want the stars to appear as dots not trails. My go to lenses for my Nikon D700 are and Nikon 16 – 35 mm f/4.0 VR. By using a remote controller it allows you to use longer exposures than 30 seconds.
As for settings: Always take photos in RAW file format.
Focus to infinity either manually or simply using one bright spot to focus on. Use the widest aperture your lens has as far as the result is not too blurry. Boost up ISO, I would recommend start from ISO 1600 and go up as much as your camera can handle with a decent end result. I tend to take 30 second exposures to have the stars still when you use something like I have above with a full frame camera. For a crop sensor camera I used 11 mm lens with aperture 2.8 and 30 seconds exposure.
5. EXPERIMENT
The last but not least tip is to experiment on a location, and it’s lots of fun! So if you have found a location you think fits for the purposes of taking pictures of stars try experimenting with different exposures and perspectives. Don’t just settle on one spot try search around if you see something interesting to include in the frame. In fact, I rarely get the shot I was looking for in one shot.. I take multiple shots and experiment with perspectives and subjects.